Friday, March 22, 2013

2 1/2 year old Easter Basket

Instead of candy, I put bouncy balls and little Easter erasers in the eggs! 

2 1/2 year old Easter Basket:
(2) Bubble Guppies DVDs
Play doh
Gerber Toddler Dippers(good alternative instead of candy)
Fun ocean shaped Easter Eggs
Bunny Bubbles
Mini Trumpet & Harmonica Set
USBORNE Easter Sticker Book
Decorate the chocolate bunny
(I admit I did buy a little too much...in fact I bought a lot of the Easter stuff end of last
 season  so I actually forgot how much I really had!) 

7 1/2 month old Easter Basket

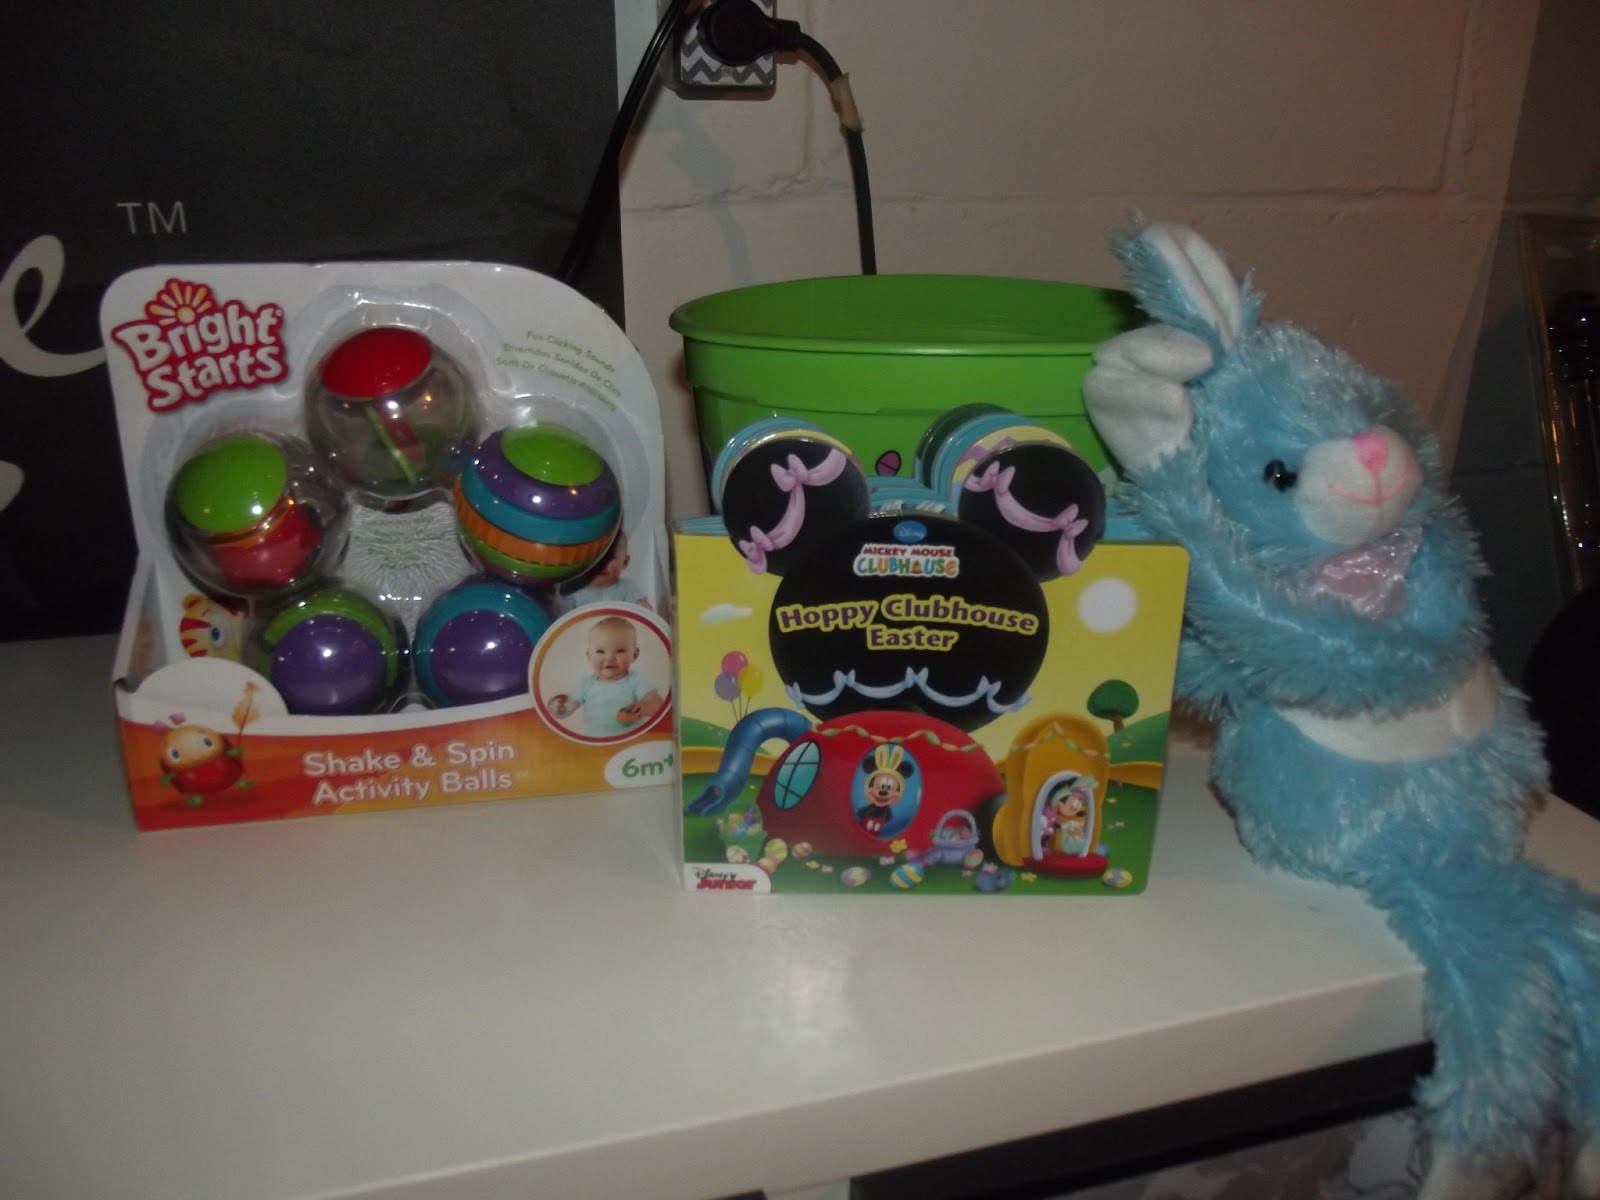
7 1/2 month old Easter Basket:
Mickey Mouse Clubhouse board book
Fuzzy Easter Bunny
Set of Bright Starts interactive balls
No candy =) You can add puffs for this age! 

1 year old Easter Basket 
Instead of filling the Easter eggs with candy, I filled them with these fun
little quirky toys

One year old Easter Basket:
(2) little books
Gerber snacks
Mini water Easter game
Soft fuzzy frog


Wednesday, March 20, 2013

Pirate Party DIY


Ryan's 2nd Birthday Party(August 2012) I made most of the decorations and bought the plates, cups and napkins at WalMart! 

Monday, March 18, 2013

Our NEW basement

BEFORE Entry to staircase 
AFTER Entry to staircase 
Before picture of basement 
AFTER Picture of basement
Curtains still needed to be added when this picture was
taken =)
We painted the walls white.
We installed carpet on the stairs and basement floor.
I made most of the decor and bought the white furniture at IKEA. 
BEFORE picture of small wall 
AFTER New entertainment center(Notice the curtains)
COMPLETED BASEMENT INCLUDING BABY TOYS ON
FLOOR ALREADY ;) 
IKEA book case transformed into a reading bench for the
boys! 
I bought foam at hobby lobby and cut it down to fit the bench.
I hand sewed a big white button in the middle to add just
a little bit of color on the seat.
I also took the extra fabric I had left over and made
two small pillows for Ryan to lounge around with 
I went to a second hand store and bought books strictly
for the basement. They fit perfectly on the ends of the
bench! 


I also added small cubes under the bench for storage space
for small toys. I got these small cubes at WalMart for $2


IKEA children's table $19.99
I used spray paint to paint it my accent color =) 

My office area 


IKEA storage unit...originally white with black door and drawers.
I used mod podge and scrapbook paper to make it more "Me"


Pinterest Idea for a dry erase calender 


Found this clock to match my colors at Target for $6.99!


Monday, March 11, 2013

IKEA TRANSFORMATION: SILVER LANTERN

I recently took a trip to IKEA and found this cute lantern for $7.99. I am currently re-doing my basement. My inspiration is Grey/White Chevron with a burst of Teal here and there. I couldn't find anything that I liked to put inside of the lantern so I decided to make my own. A lot of times you will see people put candles in lanterns like this but I wanted something different! 


Materials Needed:
Any size of lantern will do
Unfinished wooden balls in various sizes(# of balls depends on how many you wish to use)
Mod Podge Gloss
Foam Brush
Egg Carton
Scissors
Scrapbook paper or Tissue paper or Thin pages out of a book/newspaper
Fine Glitter(optional)
I bought three bags of various sizes of balls at Hobby Lobby.

Cut different sizes of strips  from the scrapbook paper you choose.  

You will apply the mod podge on each strip and put them onto the ball. You can place the strips any way you would like....just make sure that the all the wood is covered. Once you have covered the entire ball with strips, you should brush the entire ball with a thin coat of mod podge to seal all the strips together. If you want to add a special sparkle, sprinkle VERY FINE glitter onto the balls. I chose to only sprinkle glitter on the chevron balls just to add that extra something!  An egg carton is a perfect place to place the balls in to dry. It only took about twenty minutes for all the balls to dry. 

Once all the balls are dry you can place the different balls in your lantern how you please. 

Fabric Covered Canvas

Materials you will need:
Flat Push Pins
Scissors
Fabric
Any size of canvas

You will need to add 1 1/2" to 2" to the canvas size before you cut out your fabric.
Turn your canvas over onto the opposite side of the fabric. You will start by folding over one side at a time  and start pinning each side down. I did the left/right sides first and then finished with the top and bottom. 


I plan on hanging four in my basement on white walls. I chose to do a different coordinating fabric with each one. You can choose any type of fabric you want! Another idea: You can glue a painted wooden letter to a fabric covered canvas to make a cute wall hanging(Such as the first letter of your last name).